
On desktop PCs, Chrome has a bad reputation for consuming many resources. Even though Google has made significant improvements over the years, there are still many chances that the web browser may encounter an “out of memory” error. The reason for this error is not certain, but we have compiled a list of troubleshooting tips to fix this issue.
How Do I Resolve Chrome’s “out of memory” Warning Message?
It is important to immediately emphasize that the more RAM you have, the better. For smooth operation with a standard number of Chrome tabs, your computer should have at least 16GB of RAM. If you are still getting this error after 16 GB of RAM then you should follow these expert-recommended tips listed below:

Tip #1: Reload The Tab That Is Impacted

If your machine has enough RAM, the problem is usually a one-time event that may be resolved by just refreshing the tab in question. No more steps are required. Some or all of the data you entered might be saved. Be sure to copy the content that you have typed on the web browser and paste it on Notepad.
Tip #2: Shut Down All Unwanted Tabs

You should close a Chrome tab if you haven’t used it in several hours or days because even one can use hundreds of gigabytes of RAM. Put a webpage in your reading list or bookmark it if you must return to it later. After closing the unnecessary tabs, refresh your current tab by pressing F5 on your keyboard.
Tip #3: Ensure The Memory Saver Is Turned On
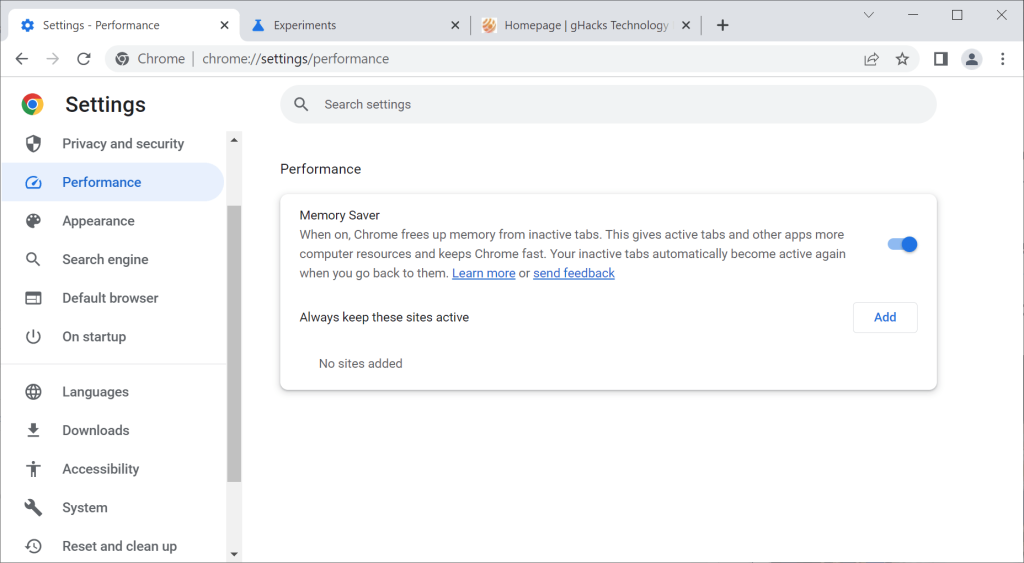
The ability to automatically release RAM from tabs that haven’t been used in a while is a relatively new feature in Chrome. Here are the steps to enable the Memory Saver on Chrome.
Step 1: Open Chrome browser and click on the Hamburger menu in the top-right corner.
Step 2: From the Settings dropdown, scroll down and hover the mouse cursor on More Options and click on Performance.
Step 3: A new tab will open where you will find the Memory Saver option on the right side.
Step 4: Slide the toggle button towards the right to enable it.
Note: If you have certain websites (Gmail, Spotify) that need to stay active even though they are not used for a long time then you can add these exceptions by clicking the add button under “Always keep these sites active”.
Tip #4: Update Chrome
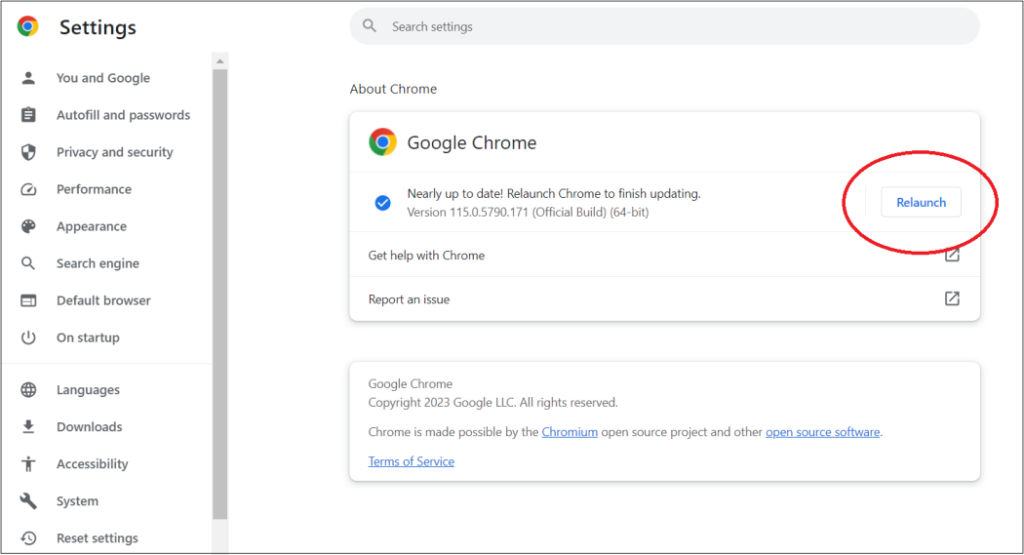
Google releases browser updates frequently, often several times a month. Usually, this is limited to security updates and bug patches, but occasionally, it does memory-saving improvements. Here are the steps to check Chrome updates:
Step 1: Open the Chrome browser and click on the three dots located in the top right corner.
Step 2: Scroll down and click on Settings.
Step 3: A new tab will appear where you have to click on the About Chrome tab in the left section. Chrome will start updating automatically.
Tip #5: Take Out Any Extensions That Aren’t Being Used
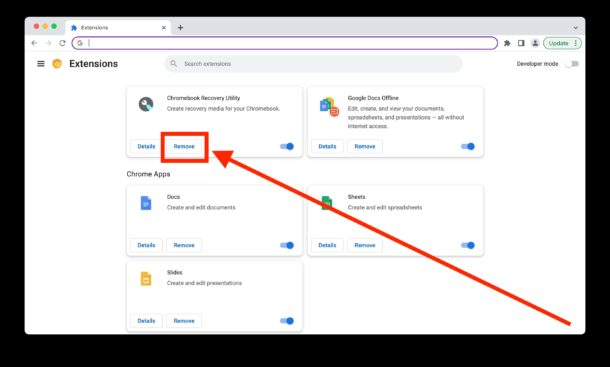
A key component of the Chrome experience is extensions. However, some can be more demanding than others, and it’s very simple to accumulate a collection of extensions that you no longer need. By selecting Extensions from the triple-dot menu and clicking Remove next to any unnecessary extensions, you can get rid of extensions. Google goes so far as to indicate which extensions have been removed from the Chrome Web Store; if they are still functional and you are reliant on them, you should remove them immediately.
Tip #6: Delete The Cache In Chrome

To increase the loading speed of a website, Chrome stores a lot of recently used page data locally. Hence, it’s a good idea to rule out cache problems before trying more involved debugging techniques. Here is what you need to do:
Step 1: Launch Chrome Browser and click on the triple-dot option.
Step 2: Select Clear Browsing Data from the drop-down menu.
Step 3: Click Clear data after making sure that only Cached photos and files are selected.
Note: Every time you access a particular webpage, Chrome will need to reload all of its resources.
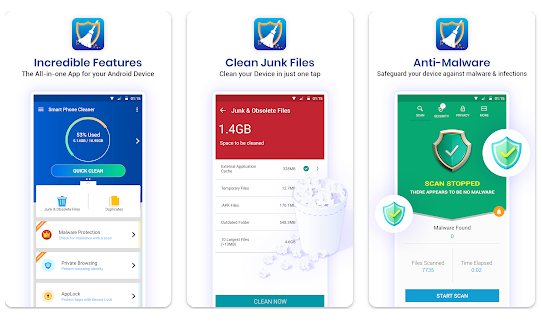
Bonus Tip: Use Smart Phone Cleaner To Optimize Android
If you are facing issues with Chrome on your Android then we recommend using Smart Phone Cleaner, which has built-in optimization modules to keep your handset up and running. It is an incredibly feature-rich cleaner tool for Android users that lets you clear up unwanted files (junk, cache) and remove old or unused ones from your device to free up storage space.

Conclusion
In conclusion, our guide on the top ways to fix Chrome’s “Out of Memory” error code equips users with effective solutions to overcome this common challenge in Google Chrome. By following the expert-recommended troubleshooting tips and practical steps, users can address issues such as sluggish performance, crashes, and unresponsive tabs caused by memory constraints.
For more such interesting article like this, app/softwares, games, Gadget Reviews, comparisons, troubleshooting guides, listicles, and tips & tricks related to Windows, Android, iOS, and macOS, follow us on Google News, Facebook, Instagram, Twitter, YouTube, and Pinterest.


![Instagram Story Won’t Go Away After Viewing [Top 8 Solutions]](https://www.naijatechnews.com/wp-content/uploads/2024/03/Instagram-Stories-Repeat.jpg)


